Creating Xenica Test VM
Please follow the below steps to install a test VM to try Xenica
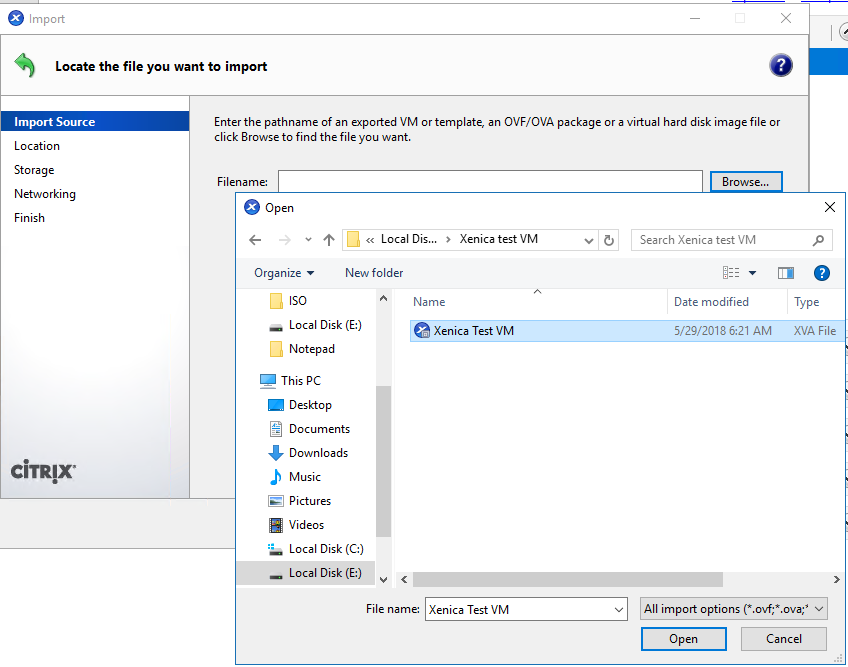
Step:1 Download the Xencia_ Install template from the below link, and Import it on your Xenserver.
Step:2 Power On the VM and login Using the below User name and password
Username: root
Password: Xenpass$1$2$3#4
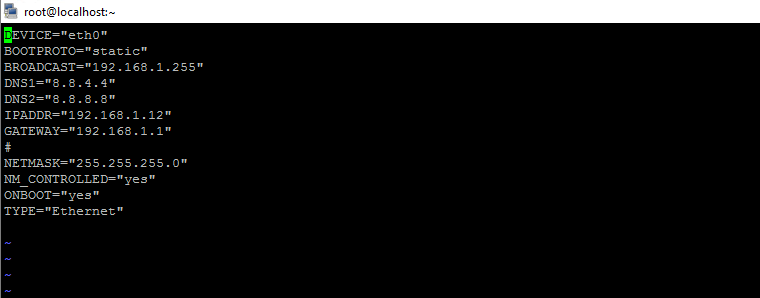
Step:3 Using the below command change the IP to your desired IP and restart networking to apply changes.
vi /etc/sysconfig/network-scripts/ifcfg-eth0

systemctl restart network.service
Step:4 Go to the below WHMCS directory and locate the file configuration.php as shown below.
cd /var/www/html/whmcs/
ls -l |grep configuration.php
Step:5 Edit the file using the below command and enter your WHMCS license (Dev) as shown below,and save the file. (:wq!)
vi configuration.php
Step:6 Restart the httpd service using the below command
service httpd restart
Step:7 Use the below URL to access your WHMCS, you should see the WHMCS login page as below
http://your_ip/admin
Step:8 Login Using the below credentials.
Username: test
Password: TestPass$1$2$3#4
Step:9 Click on Addons and Select –> Xenica
Step:10 Under License tab, enter your Xenica License and click –> Update
You can see the message “your license is valid and active.”


